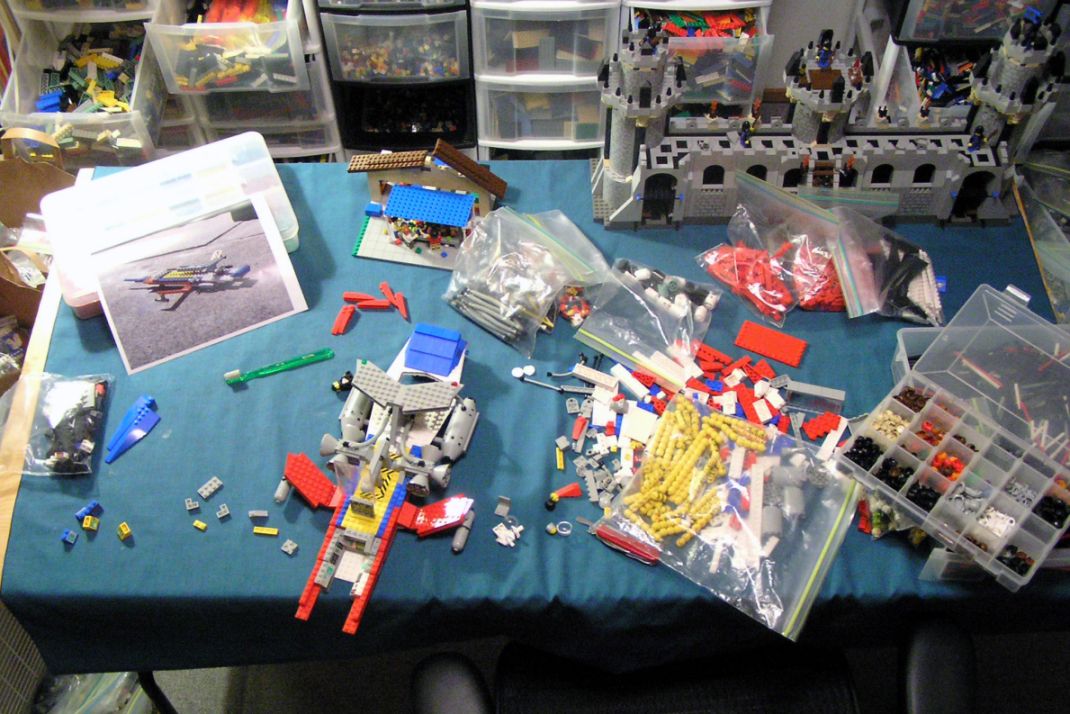
The timing was perfect. I'd added this digitally scanned slide (from July, 1979) on my main page just as Jordan posted the news about the contest. I'd just finished photographing a major project, and finally felt that I had the free time to jump into something new. Having just one picture to work from was very challenging and even more inspiring, and I had a total blast from start to finish!
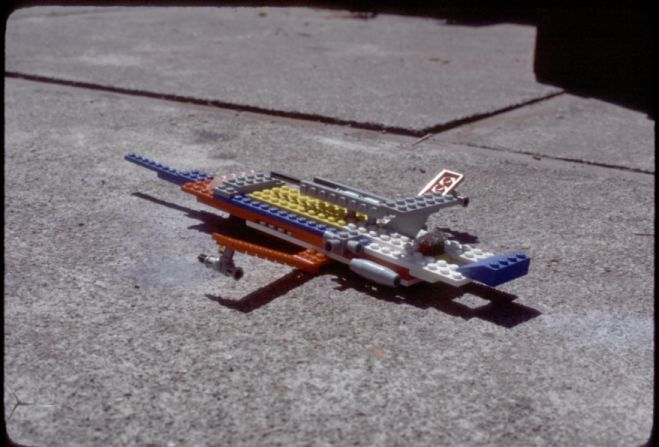
The challenge was two-fold: I had to try and make the new MOC look sophisticated compared to the original, and I had to keep to the crazy color scheme as well! I never thought I'd like the idea of building a "Rainbow Warrior", but it gave me a lot of ideas for what the ship was for and who would be flying it.
.JPG)
Since the ship has so many different colors, I thought that a sensible explanation would be that the pilot, who is also an ace mechanic, cobbled the ship together by scrounging the local spaceport junkyards for salvageable scrap. Hence Carl's nickname, "The Cobbler." No, he can't and won't fix your space boots, so don't ask (unless you'd like a crescent wrench upside your head)!
.JPG)
I made my first attempt to add random greebling wherever I could as the ship's supposed to be stitched together with lots of disparate parts. It was a new and fun experience trying arrangements of parts that I'd never utilized for a Space MOC. It was also quite challenging to adapt the basic structures on the original MOC into something that looked similar, while at the same time figuring out what logical function they would serve.
.JPG)
I decided that the two jet plane engines on the sides of the original MOC would be fuel tanks that feed the two very large retro rocket assemblies on the new ship. I decided on the model number JL-79 because the slide was taken in July, 1979 (I was 10 years old).
.JPG)
This was the first time I used stickers on an MOC, and they really helped to add some realistic detail to the finished model.
.JPG)
The Technic assemblies on the wings and back of the ship (which I'd "borrowed" from my #775 Fire Fighter) were transformed into crude weapons of some kind, with slightly more modern backups installed alongside.
.JPG)
The top of the ship probably consumed most of my time, as I tinkered with lots of parts arrangements for maximum greeblage and blending of the disparate colors. I've been learning more and more that the Plate 1 x 2 with 1 Stud is one of my best building friends! This part proved to be vital in blending the tailfin into the body.
.JPG)
.JPG)
I suspect I may become a serious sticker junkie after the ways I was able to use them in this MOC. Learning how to place them effectively, without too much of a concentration, was really an addicting challenge! The sticker sheet that I had from #7477 T1 Typhoon vs. T-Rex had some wonderfully realistic choices.
The yellow sticker came from #7893 Passenger Plane.
.JPG)
On the original MOC, I'd probably just slapped a blue slope on the end for swooshyness. For the re-tool I resolved to transform this area into an engine since the original grey, one-piece jet engines were now fuel tanks.
.JPG)
Another decal sheet, this time from the #7191 UCS X-Wing, gave me something nice to dress up the back. I fiddled around with the interior design for a little while, but once I hit this arrangment with my blacklight, I knew I was done.
.JPG)
Wouldn't it be awesome if TLG made 9 volt UV lights that could work like this?!
.JPG)
Time to meet Carl Clotchkins, intrepid pilot, ace mechanic and cargo hauler extraordinaire! I'd been burning to use the bubble dome that the Sandy Cheeks mini-fig sports in #3831 Rocket Ride and since Carl is a crusty, old-fashioned fellow, I knew it would be the perfect fit for him.
.JPG)
I was thrilled to be able to incorporate the UCS X-Wing canopy as well, because it became possible to add a lot of detail to the cockpit area that's very easy to see even when the canopy is closed. However, given that the long weapon on the back of the ship hangs out quite far over the canopy, I had to come up with a rather unconventional way for it to open.
.JPG)
Once again, design constraints provided inspiration for a solution that fit perfectly with the theme of the ship. Since Carl's not about to toss anything away just because it doesn't fit exactly right, the canopy just opens up slightly and then slides to the right so as not to bump the weapon just above it.
.JPG)
Again, as Carl is a patchwork kinda guy, I used lots of different consoles in different colors for the cockpit.
.JPG)
.JPG)
Behind his wooden seat (I told you, he NEVER throws anything away!), Carl has stashed the requisite survival items, a long-range rifle, communicator, wrench and a Pockster Blaster, one of the finest of the Chrome Age laser blasters. Carl has had his for twenty-plus years, and maintains it with tender loving care.
.JPG)
Right before I began photography, I realized that I could add one more cute little detail that would really help sell the funky, old-timey feel of the ship: a small egress ladder on wheels.
.JPG)
.JPG)
.JPG)
.JPG)
I did have to make one (illegal to some) alteration to give Carl the ability to breathe. The small nozzle at the top of the airtank on his back had to be shaved off for the bubble dome to fit. I didn't have any white airtanks available, and I thought the Scuba version looked more antique anyway.
.JPG)
"So, it's a cargo hauler, eh? All these pictures are very nice, but where's the freakin' cargo?!"
Here we are! Given the long, flat shape of the ship, I was thinking about it being a hauler of some kind, but what kind of cargo? The answer came from a sticker sheet for a Train set I had. Once I applied them along the side of the ship, I immediately began to get ideas about what the containers would look like and what would be in them.
Going from front (left) to back (right) you can see what goods Carl usually moves from planet to planet. It was really inspiring to take all my direction from just a sticker and then turn it into a tangible object that looked convincing.
.JPG)
.JPG)
.JPG)
.JPG)
.JPG)
.JPG)
.JPG)
.JPG)
.JPG)
.JPG)